建立專案
- 開啟 Visual Studio 之後
- 由上方工具列中選擇:檔案 新增\專案
- 請選擇 WPF應用程式(.NET Framework)
- 並填寫下方名稱、位置、方案名稱 (位置可任意)
- 按下 確定

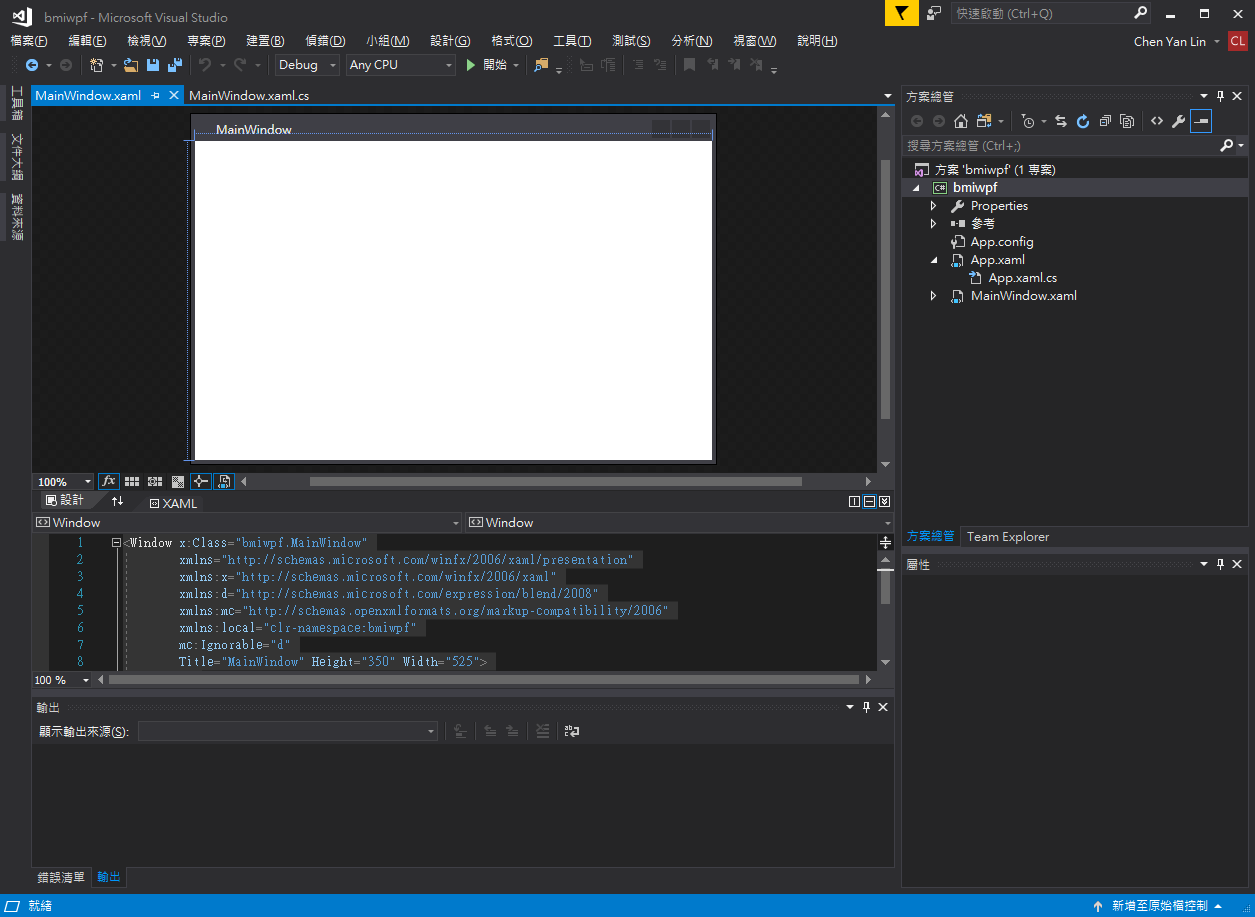
等案專案建置好後,進入編輯畫面如下。 與 Console 版本不同的地方在於 Console 版本自動開啟的檔案是 Program.cs 而 WPF 版本則是開啟了兩個檔案
- MainWindow.xaml --------- 這是介面設計的檔案
- MainWindow.xaml.cs ----- 這是程式部分的檔案

初始程式碼
現在先讓我們來看看這兩份預設的程式碼,第一個是畫面下方的 XAML 介面設計的標籤語法:
介面 - MainWindow.xaml
<Window x:Class="bmiwpf.MainWindow"
        xmlns="http://schemas.microsoft.com/winfx/2006/xaml/presentation"
        xmlns:x="http://schemas.microsoft.com/winfx/2006/xaml"
        xmlns:d="http://schemas.microsoft.com/expression/blend/2008"
        xmlns:mc="http://schemas.openxmlformats.org/markup-compatibility/2006"
        xmlns:local="clr-namespace:bmiwpf"
        mc:Ignorable="d"
        Title="MainWindow" Height="350" Width="525">
    <Grid>
    </Grid>
</Window>
這是用 XAML 語法寫成的介面碼,看起來很像設計網頁用的 HTML,它們的寫法幾乎一樣。 目前使用了兩個標籤(tag),Window 和 Grid,而 Window 帶有很多屬性 (可以試試看修改 Title、Height、Width 屬性)。
之後我們新增的其他介面元件標籤,都得放到 Grid 裡面。
程式 - MainWindow.xaml.cs
using System;
using System.Collections.Generic;
using System.Linq;
using System.Text;
using System.Threading.Tasks;
using System.Windows;
using System.Windows.Controls;
using System.Windows.Data;
using System.Windows.Documents;
using System.Windows.Input;
using System.Windows.Media;
using System.Windows.Media.Imaging;
using System.Windows.Navigation;
using System.Windows.Shapes;

namespace bmiwpf
{
    /// <summary>
    /// MainWindow.xaml 的互動邏輯
    /// </summary>
    public partial class MainWindow : Window
    {
        public MainWindow()
        {
            InitializeComponent();
        }
    }
}
上面就是預設的程式碼,可以看到上方的 using 多了不少,這是因為視窗程式需要載入比較多介面元件類別,用來顯示出畫面,其他部分看似差不多。
InitializeComponent(); 是建立視窗介面的預設方法。
// 是註解的意思,程式製作時會忽略兩個斜線之後的內容 (這裡使用三個)